Being a JAMstack developer in 2019 makes me feel like I am living in a wonderland. All these modern frameworks, tools, and services make our lives as JAMstack developers quite enjoyable. In fact, Chris would say they give us superpowers.
Yet, there is one particular platform that stands out with its formidable products and features—Netlify. You’re probably pretty well familiar with Netlify if you read CSS-Tricks regularly. There’s a slew of articles on it. There are even two CSS-Tricks microsites that use it.
This article is more of a love letter to Netlify and all of the great things it does. I decided to sit down and list my five favorite things about it. So that’s what I’d like to share with you here. Hopefully, this gives you a good idea not only what Netlify is capable of doing, but helps you get the most out of it as well.
You can customize your site’s Netlify subdomain.
When creating a new project on Netlify, you start by either:
- choosing a repository from a Git provider, or
- uploading a folder.
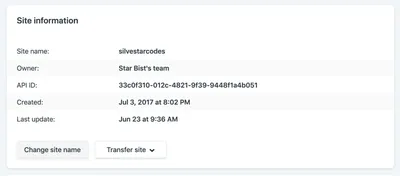
The project should be ready in a matter of minutes and you could start configuring it for your needs right away. Start by choosing the site name.
“The site name determines the default URL for your site. Only alphanumeric characters and hyphens are allowed.”
Netlify randomly creates a default name for a new project. If you don’t like the name, choose your own and make it one that would be much easier for you to remember.

For example, my site name is silvestarcodes, and I could access my site by visiting silvestarcodes.netlify.com.
You can manage all your DNS on Netlify.
If you are setting up an actual site, you would want to add a custom domain. From the domain management panel, go to the custom domains section, click on the “Add custom domain” button, enter your domain, and click the “Verify” button.
Now you have two options:
- Point your DNS records to Netlify load balancer IP address
- Let Netlify handle your DNS records
For the first option, you could read the full instructions on the official documentation for custom domains.
For the second option, you should add or update the nameservers on your domain registrar. If you didn’t buy the domain already, you could register it right from the dashboard.
Netlify has a service for provisioning DNS records called Netlify DNS.
Once you have set the custom domain, you could handle your DNS records from the Netlify dashboard.

If you want to add a custom subdomain for a different branch, like develop subdomain for the develop branch, you could do it automatically from the Domain Management section in the Settings section of your site. All you have to do is select a branch and Netlify would add a new subdomain for you automagically.

If you want to add a new subdomain for a different website, like play subdomain for a separate website, you could create a new Netlify site, add a new subdomain as a custom domain, and Netlify would automatically add the records for you.
As an icing on the DNS management cake, Netlify lets you create Let’s Encrypt certificates for your domain automatically… for free.
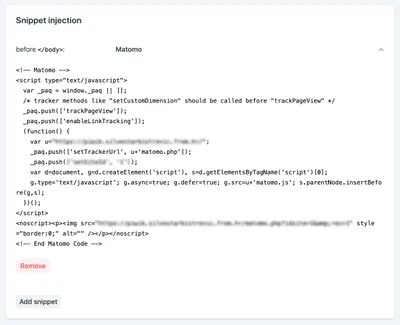
You can inject snippets into pages, which is sort of like a Tag Manager.
Snippet injection is another excellent feature. I am using it mostly for inserting analytics, but it could be done for so much more, like adding meta tags for responsive behavior, favicon tags, or Webmention.io tags.

When inserting snippets, you could choose to append the code fragment at the end of the <head> block, or at the end of the <body> block.
Every deploy has its own URL forever.
Netlify creates a unique preview link for every successful build. That means you could easily compare revisions made to your site. For example, here is the link to my website from January this year. Notice the style changes. Here is the link from January last year.
In his talk, Phil Hawksworth calls this feature immutable, atomic deploys.
“They are immutable deployments that live on forever.”
— Phil Hawksworth
I found this feature useful when completing tasks and sending the preview links to the clients. If there is a person in charge of handling Git-related tasks, like publishing to production, these preview links could be convenient to understand what to expect during the merge. You could even set up the preview builds for every pull request.
Netlify allows for the cleanest and most responsible A/B testing you can do.
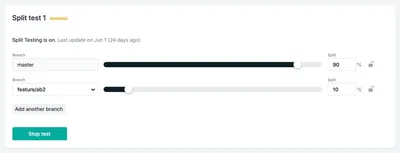
If you ever wanted to run A/B tests on your site, you would find that Netlify makes running A/B tests quite straightforward. Split testing on Netlify allows you to display different versions of your website from different Git branches without any hackery.

All you have to do is create a separate branch, make changes, and publish the branch. Then you should be able to select the branch, set a split percentage, and start the test. You could even set a variable in analytics code to track which branch is currently displayed.
“Netlify’s Split Testing lets you divide traffic to your site between different deploys, straight from our CDN network, without losing any download performance, and without installing any third party JavaScript library.”
I have been using A/B testing on my site for a few different features so far:
- Testing different versions of contact forms
- Displaying different versions of ctas
- Tracking user behavior, like heatmaps
If you want track split testing information, you could set up the process environment variable for this purpose. You could learn more about it in the official documentation. The best part? Most A/B testing services use client-side JavaScript to do it, which is unreliable and not great for performance. Doing it at the load balancer level like this is so much better.
There are lots of options for notifications, like email and Slack.
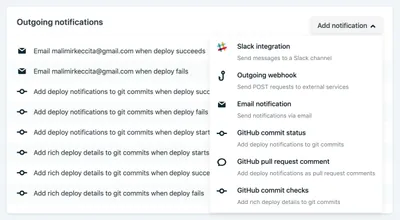
If you want to receive a notification when something happens with your Netlify project, you could choose from a wide variety of notification options. I prefer getting an email for every successful or failed build.

If you are using Gmail, you could notice "See the changes live" link for every successful build when hovering your message in Gmail inbox. That means you could open a preview link without opening the email. There are other links like "See full deploy logs" when your build have any issues or "Check usage details" when your plan is near its limits. How awesome is that?

If you want to set up a hook for third-party services, all you need is a URL (JWS secret token is optional). Slack hooks are built-in with Netlify and could be set up within seconds if you know your Slack incoming webhook URL.
Conclusion
All of the features mentioned above are part of the free Netlify plan. I cannot even imagine the effort invested in providing a seamless experience as it is now. But Netlify doesn’t stop there. They are introducing more and more new and shiny features, like Netlify Dev CLI for local development and deploy cancelations. Netlify has established as an undoubtedly game-changing platform in modern web development of static websites, and it is a big part of the growth and popularity of static sites.